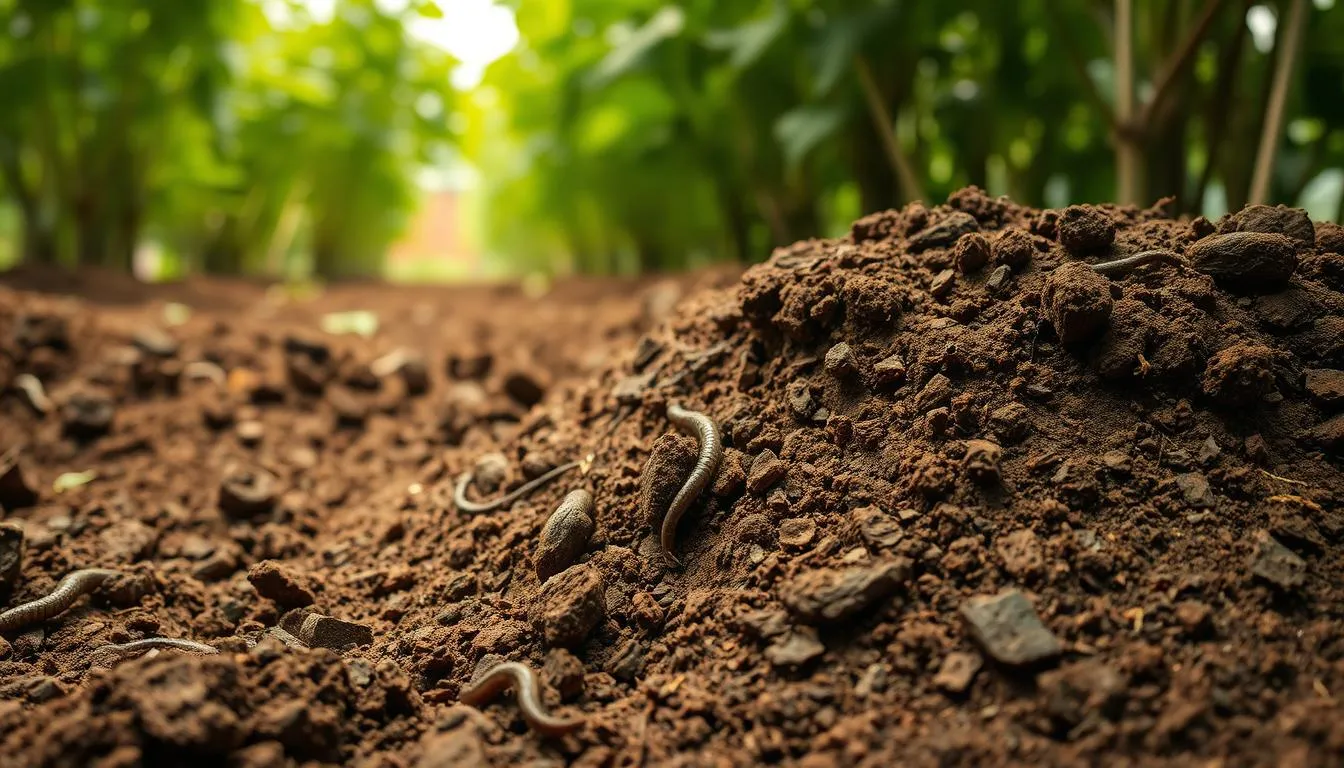
Surprising fact: a single tablespoon of healthy soil can contain more life than there are people on Earth, and that living web drives plant health and yield.
This friendly approach asks you to build structure and fertility from the top down. The method lays a weed-suppressing base, then a rich compost layer and keeps the underground life undisturbed.
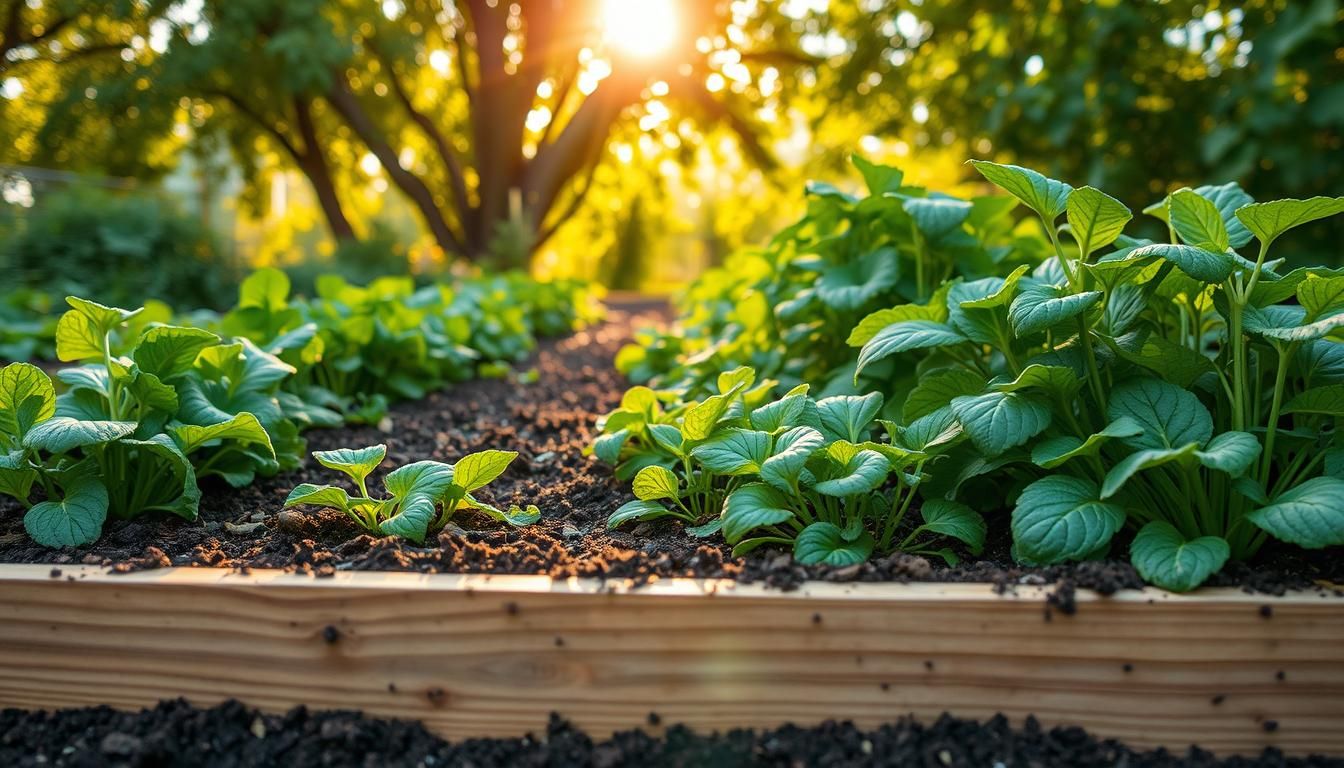
Why it matters: protecting worms and mycelium helps the soil retain moisture and feed vegetables with less work. You can see fewer weeds and stronger plants in the first season, with bigger gains in year two.
Late winter to early spring is ideal to begin if the ground is not waterlogged, but you can start any time the soil is workable. This guide shows a weekend plan to build a first bed and expand across the season.
Key Takeaways
- Top-down fertility: add organic matter on the surface to build soil and structure.
- Less labor: no double-digging, lower hauling, fewer recurring weeds.
- Start late winter or when the ground is dry enough to work.
- Expect better moisture retention and stronger vegetables in season one.
- Simple recipe: weed barrier, ~4-inch compost layer, clear bed and path layout.
What Is the No-Dig Method and Why It’s Perfect for Home Vegetable Gardens
You create healthy soil by adding rich material to the surface and letting nature blend it in. This simple approach avoids breaking, lifting, or turning the ground. Instead, gardeners spread well-rotted compost and mulch on top.
The core idea: feed the soil from the top, let roots and worms do the work
Feed the surface: add a layer of organic matter and plant into that new surface. Leaving the soil undisturbed preserves natural pores and channels. Those pores help water and air reach roots quickly.
Less work, fewer weeds, better soil health over time
Worms and microbes pull nutrients downward and build fertility naturally. Scientific studies show reduced cultivation improves soil health and nutrient cycling. Over years you will see darker, richer soil that holds moisture better.
Homeowner payoff: fewer weeds emerge because weed seeds stay buried and compost supplies nutrients while biology does the mixing. This method adapts to many sites and soil types and cuts repetitive work for beginners.
| Benefit | Why it matters | What you do |
|---|---|---|
| Better soil structure | Maintains pores for water and air | Top-dress with compost and mulch |
| Natural fertility | Worms and microbes move nutrients down | Provide steady organic matter additions |
| Less maintenance | Fewer weeds and less reworking | Do annual surface top-ups |
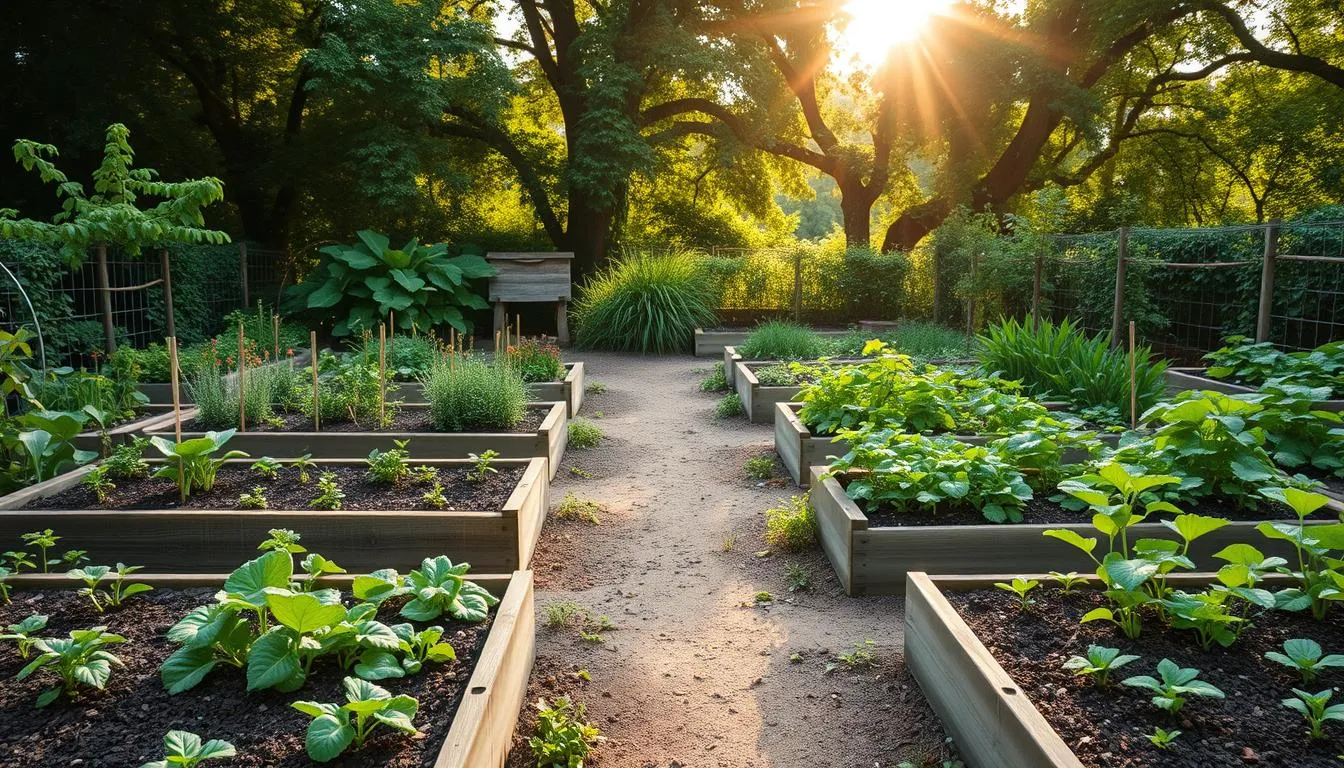
Plan Your Garden Layout for Success
A clear layout saves effort and keeps water moving where plants need it. Spend a little time on paper and you’ll save heavy lifting later.
Practical dimensions: aim for bed widths around 30–36 inches so you can reach the center from both sides. Set paths at 18–24 inches for comfortable walking and wheelbarrow access.
Choosing bed and path dimensions for efficient access and water flow
Straight beds aligned with the slope help water move through soil evenly and avoid pooling. A three-foot-wide bed with 18–24 inch paths is a common, efficient example.
Positioning beds, paths, and compost areas to maximize space
Map the area on a simple grid (one cell = one square foot) to total bed versus path area and estimate compost and mulch volumes.
- Place the compost area for easy access and turning without blocking main paths.
- Consider sun exposure, slope, and hose spigot when orienting the layout.
- Mow tall grass before laying materials so surfaces are even and easy to cover.
Seasonal timing in the United States: why late winter to early spring is ideal
Time your build for late winter to early spring when soil is workable and you can plant cool-season crops. Leave room for future expansion and factor in wildlife and wind for fencing or windbreaks.
For a quick planning tool, try a simple grid or draw a simple garden plan to visualize the whole area before you start.
Materials and Tools: Organic Matter, Cardboard, and Mulch Done Right
Gather the right materials before you layer the garden so each step builds lasting structure. Use quality inputs to protect soil life and speed establishment.
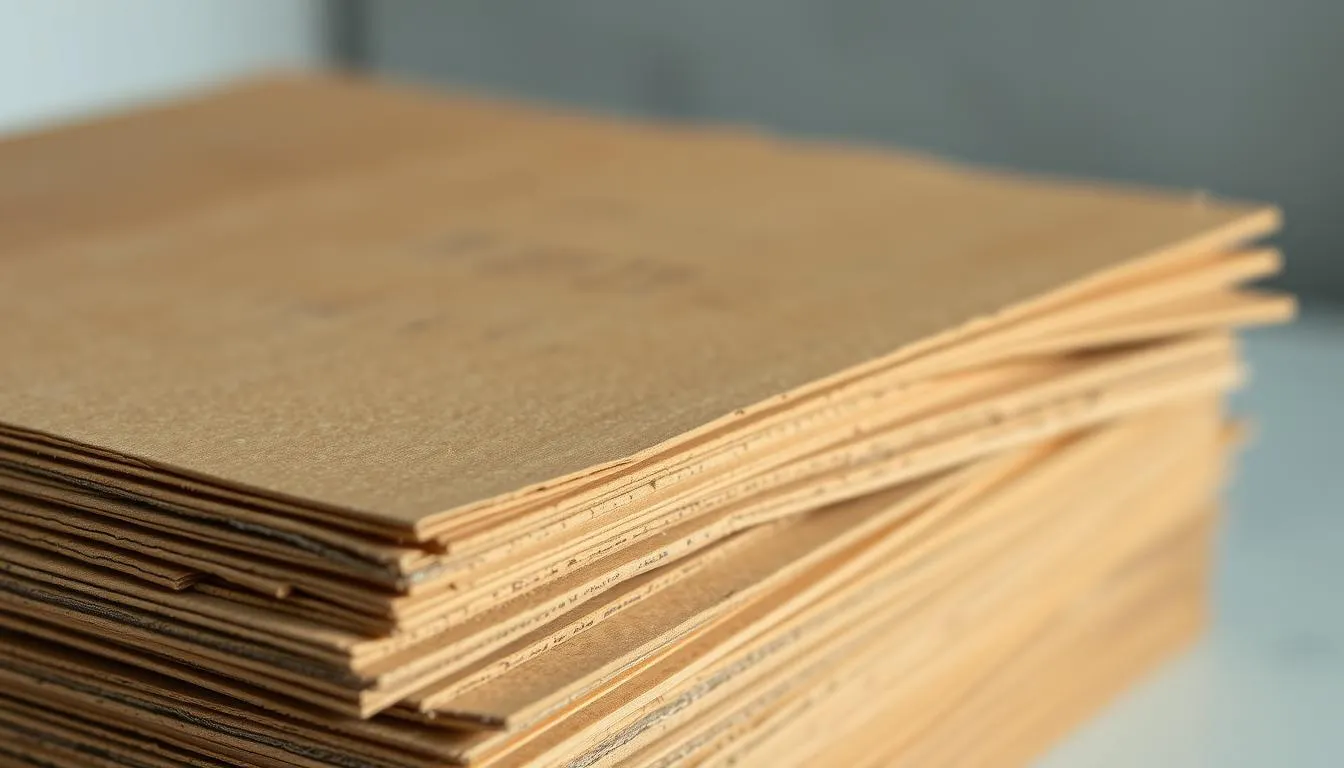
Cardboard selection and prep to suppress weeds
Choose double layers of plain brown cardboard and avoid glossy printing. Remove all tape and staples so nothing contaminates the ground.
Overlap seams by several inches to block light. Wet the sheets so they sit flush and soften to the surface.
Compost depth and quality for a healthy surface layer
Aim for about a 4-inch (10–15 cm) layer of well-rotted compost as the main growing layer. If using municipal compost, confirm it is mature, screened, and free of contaminants.
Keep additional fertilizers minimal; the organic matter within the compost feeds plants while biology builds long-term fertility.
Mulch for paths and bed edges to reinforce structure
Mulch paths with wood chips or shredded bark to lock in edges and keep walking areas tidy. As the cardboard breaks down over months, the surface transitions into richer soil.
- Have a bow rake and a long tape for straight runs.
- Use a board for gentle tamping and temporary sideboards while filling.
- Expect the cardboard to decompose within months and improve the soil beneath.
How to Build no‑dig vegetable beds Step by Step
Start by creating a clean, flat base so each following step sits securely and works as intended. A clear surface makes layering easier and helps water move evenly through the soil. Work in short stretches so you stay tidy and efficient.. The foundation of no-dig beds relies on sustainable mulching layers for no-dig systems
Prepare the ground
Cut back or smother tall grass and stubborn weeds so the area is even and easy to cover.
Create a tight weed barrier
Lay overlapping cardboard across the full footprint. Seal seams and edges so light cannot reach weed seeds. Wet the cardboard so it molds to the ground and begins to break down.
Build the growing layer
Add roughly 4 inches of compost and use a bow rake to level the layer. Lightly tamp with a flat board to settle the surface without compacting life below.
Finish paths and plant
- Move temporary side boards forward to keep bed width consistent as you extend the run.
- Mulch the paths to support edges and keep walking areas clean.
- Water the surface lightly to reduce dry pockets before planting.
Tip: label each new bed and start planting into finished sections rather than waiting to finish the whole plot.
Planting into Your New Beds the Smart Way
Start planting when the compost is well-rotted and at least four inches thick. A mature top layer lets you sow and set out young plants on the surface without disturbing the soil below.
Direct sowing works well for quick crops like radishes and spinach. Sow seeds shallowly into the compost surface and keep them moist until they sprout. Stagger sowing dates for leafy greens to avoid one big harvest all at once.
Transplants vs. direct sowing
Use cell-grown transplants for a faster, more reliable start. Larger plants resist slug damage and establish in cool spring soil faster than tiny seedlings.
What to plant first
Favor cool-season crops early: peas, spinach, radishes, onions, lettuces, and broad beans do best in spring. For potatoes, set seed tubers on the surface and mound compost up around the shoots as they grow.
- Make holes by parting the compost; roots will reach the moist soil beneath.
- Avoid deep furrows to protect the base layer and the living soil structure.
- Remove volunteer seedlings and weed seeds early so young crops face less competition.
- Use row covers to speed germination and shield tender starts from pests.
| Action | Best for | Risk | Quick tip |
|---|---|---|---|
| Direct sow | Radishes, spinach, lettuces | Birds, slugs | Keep surface moist; cover if needed |
| Transplant | Tomato, pepper, brassicas | Shock if roots disturbed | Plant in cell mass; avoid root exposure |
| Potato on surface | Early potatoes | Rodents, shallow drying | Mound compost as shoots appear |
| Stagger sowing | Leafy crops | Too many at once | Sow every 2–3 weeks for steady harvests |
Water gently after planting to settle compost around roots without washing small seeds away. This simple approach keeps the soil life intact and helps new crops thrive using the method’s full benefits for gardening success.
Ongoing Care: Water, Mulch, and Minimal Disturbance
A light-touch routine of water, mulch, and yearly compost keeps the system productive. This approach protects soil life and reduces chores.
Watering on a compost surface and preserving soil structure
Water less often but give deeper soakings so moisture moves through the compost and into the soil below. This encourages roots to reach for steady moisture and builds resilience.
Check moisture with a finger or probe before irrigating. Schedule watering in cooler parts of the day to cut losses and keep foliage dry.
Top-dressing each year to maintain fertility and soil health
Top-dress about an inch of mature compost each year to supply nutrients and refresh organic matter on the surface. Keep disturbance minimal: make small planting holes only when needed.
Mulch paths to reduce evaporation, prevent erosion, and keep edges tidy so walking areas stay safe and clear.
| Care task | Why it matters | Quick action |
|---|---|---|
| Deep watering | Drives roots downward; preserves structure | Water slowly for 30–60 minutes per zone |
| Yearly top-dress | Replenishes nutrients and organic matter | Add ~1 inch mature compost each year |
| Mulch paths | Reduces evaporation and erosion | Refresh wood-chip mulch as needed |
- Resist broad cultivation; let biology cycle nutrients.
- Observe plants for nutrient signals and adjust annual top-up.
- Track additions each year to fine-tune garden fertility over time.
Tackling Weeds, Slugs, and Other Common Challenges
Tackling common pests and stubborn runners early keeps the system tidy and productive. A few small checks each week prevents small problems from becoming big ones.
Rhizomatic spreaders such as Canada thistle or mint can push up as the cardboard breaks down. Pull young shoots when they are small. For runners near the edge, remove the visible crown and follow roots back into the ground to extract runners completely.
Extend the cardboard and mulch to the garden boundary to block grass and edge encroachment. Keep paths mulched so grass can’t creep back and spot weeding stays quick.
Reduce slug habitat by removing rotting wooden borders and trimming the lowest yellowing leaves on leafy crops. After rain, inspect for slugs and fresh weed growth; act fast when both are most active.
- Avoid turning soil; pull young weed growth from the surface.
- Use short tarp smothering between crops to reset heavy infestations without chemicals.
- Keep a hand fork or hori-hori for targeted removals that spare surrounding life.
Tips and Methods Inspired by Charles Dowding
Practical tips from Charles Dowding focus on protecting soil life while keeping work light. These methods help the garden build fertility across seasons with simple, repeatable steps.
Leave most plant roots in place after harvest. Roots feed microbes and give structure so worms can move and create channels. Over years this boosts soil and reduces effort.
Remove lower, aging leaves on lettuces and brassicas. That cuts slug hiding spots and improves airflow. Plant potatoes on the surface and mound compost up as shoots grow instead of trenching.
- Use opaque tarps in winter to smother persistent weeds before you top up with compost in spring.
- Keep a thin layer mulch to block light from stubborn sprouts and make weeding quick.
- Fit small trees or fruit bushes at edges with local, minimal holes so root networks stay mostly undisturbed.
| Action | Why it works | Quick tip |
|---|---|---|
| Leave roots in ground | Feeds microbes and retains soil pores | Cut tops; leave roots to break down |
| Surface potatoes & compost | Easier harvest; protects soil life | Mound 3–4” compost as shoots emerge |
| Winter tarping | Smothers tough growth before spring | Use dark, breathable fabric for 8–12 weeks |
| Thin mulch layers | Suppresses light-loving weeds | Refresh annually; avoid thick clogging |
Trust the process. Charles Dowding’s methods favor steady gains over years. Watch worm activity and castings as signs the approach is working.
Conclusion
Start small and build confidence: create one tidy new bed by overlapping cardboard, adding a 4–6 inch compost layer, shaping beds and paths, and planting into the fresh surface.
This way protects soil structure and biology so worms and microbes do much of the work. Over time you will see healthier plants, fewer weeds, and easier maintenance.
Follow a seasonal rhythm: build in cool months, sow early seeds, and top-dress with organic matter each year. Use mulch on paths to control grass and edges.
Surface techniques like planting potatoes on top and leaving roots in place speed progress and protect the system. Try one bed, learn the method, then expand across your garden area.
For practical guidance and research-based tips, see no-dig gardening guidance.
FAQ
What is the no‑dig method and why is it good for home gardens?
The method focuses on feeding soil from the surface with compost and mulch rather than turning it. This encourages stronger soil structure, supports earthworms and microbes, reduces weed seeds coming to the surface, and saves time and effort over the years.
How do I prepare a new bed space with grass or stubborn weeds?
Start by mowing or cutting the vegetation close to the ground. Lay overlapping cardboard to smother remaining growth, wet it thoroughly, then add a layer of quality compost and mulch on top. Leave the barrier in place until the planting zone is ready.
What kind of cardboard should I use and how should I prep it?
Use plain corrugated cardboard without glossy print, tape, or staples. Remove any tape, overlap seams by several inches, and soak the sheets so they settle and start to break down. This creates an effective weed barrier while feeding soil life.
How deep should the compost layer be when building up a new growing area?
Aim for about four inches of well‑rotted compost as the initial surface layer. That depth gives seedlings and transplants immediate access to nutrients and helps retain moisture while soil life integrates the material.
Can I plant directly into the new surface right away?
Yes. You can transplant seedlings into the compost layer immediately, and many seeds can be sown directly. For larger crops, create small pockets of compost or make shallow trenches so roots reach the nutrient zone without disturbing the barrier below.
How do I water without disturbing the surface and soil structure?
Use a gentle hose setting, soaker hoses, or drip irrigation to wet the compost layer evenly. Water slowly to let moisture penetrate the compost and reach the soil below without washing away mulch or compacting the surface.
What is the best way to keep weeds down over time?
Maintain a continuous mulch and top‑dress with compost annually to suppress weeds and replenish nutrients. Trim bed edges, remove any persistent runners at the perimeter, and tackle rhizomatic weeds promptly by cutting at the crown rather than digging.
How do I manage slugs and other pests in surface‑fed beds?
Encourage predators like birds and hedgehogs, limit dense damp cover near plants, use copper barriers or organic bait where needed, and avoid overwatering at night. Good air flow and a tidy path reduce slug habitat.
When is the best time to start building these beds in the United States?
Late winter to early spring is ideal. The soil biology wakes up, weather allows easier layering, and you can get compost working ahead of the main growing season. Autumn works too if you want the layers to settle over winter.
How wide should beds and paths be for easy access and watering?
Keep beds narrow enough to reach the center from either side — typically 3 to 4 feet wide. Paths of 18 to 24 inches allow comfortable movement and room for mulch or stepping stones to keep edges defined and prevent compaction.
Can I use this approach near trees or established shrubs?
You can, but allow extra space. Tree roots may compete for nutrients and moisture. Keep the surface layers away from the main root flare, and avoid piling deep compost directly against trunks to prevent rot and pest issues.
What are the long‑term benefits for soil health and crop yields?
Over years, the surface feeding approach builds organic matter, improves structure and drainage, increases earthworm activity, and supports resilient plant roots. That often leads to steadier yields and less effort maintaining soil fertility.
How often should I top‑dress or add organic matter to the surface?
Top dress with an inch or two of compost each year, plus organic mulch as needed. Annual additions maintain fertility, feed soil life, and slowly increase humus without disturbing roots or structure.
Are there specific crops that benefit most from this surface‑layer method?
Leafy greens, brassicas, peas, beans, and many annual herbs do very well. Potatoes can be mounded on the surface. Deep‑rooted taproot crops like parsnips may need extra planning so roots can grow without obstruction.
What role do worms and soil life play in this approach?
Worms and microbes break down the added organic matter and pull it into deeper layers, improving structure and nutrient cycling. Encouraging that life by adding compost and avoiding disruption speeds up soil rebuilding and supports healthy roots.
How should I handle persistent perennial weeds or rhizomes?
For runners like bindweed or couch grass, cut and remove new growth regularly and isolate patches before layering. In stubborn cases, remove rhizomes by hand or cover with a thick barrier and heavy mulch for an extended period to exhaust them.